There are many reasons for wanting a small MySQL database server:
- You’re a uni student who wants to learn the SQL language better and needs a mini-testbox
- You’re a Windows user who wants to play around with Percona Server on Linux
- You’re a corporate application developer who wants a small SQL development & test box
- You’re a Internet startup that just needs a tiny startup database server without all the added costs
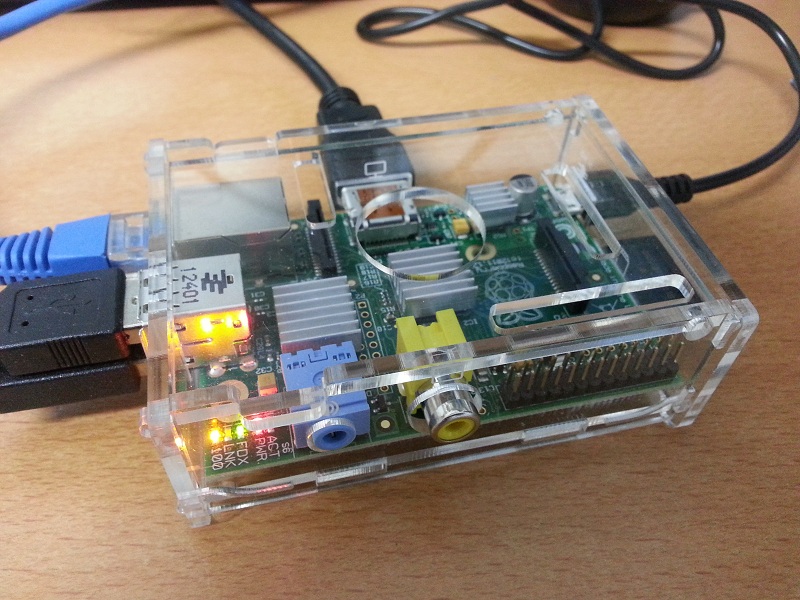
So, how about if you could setup a small Arch Linux ARMv6-based hardware device which runs Percona Server for MySQL, in a space not much bigger than your mouse, with the power consumption of only a smartphone charger, fully networked, all for under $80?
Introducing the Raspberry Pi with Percona Server:
A small disclaimer first: Arch Linux is not currently on our list of supported OS’es (i.e. we do not promise to provide binaries, even though they are available from the Arch Linux AUR repository), however if you do happen to run into issues, our support service engineers are happy to provide help.
To get started, here is what you need (prices in AU$):
- The Raspberry Pi itself (about $36)
- Make sure to get the v2 (512MiB SDRAM) version
- A plastic case (~$12 on eBay which includes 3 heatsinks)
- A SD Card reader (likely build into your laptop or PC already)
- Network setup
- A network lead and spare network port on your router
- A DHCP server (your router likely has this enabled already)
- A quality 2GB (or more) SDHC Card
- I use a SanDisk 8GB Class10 30MB/s card (~$8.50 on eBay)
- A 1Amp+ micro USB power supply + cable
- I use a 2Amp dual portapow supply (~$20 on eBay)
Total cost: ~76.5 AU$ (= ~79 US$).
Optionally, if your screen has a DVI port, you can get a HDMI Cable + DVI (male)-to-HDMI (female) connector (~$12). This enables you to connect the Raspberry Pi to your screen, and so follow what is happening on the console of the Raspberry Pi. Make sure to get the proper DVI connector for your screen as many connectors that are sold have a wrong pin layout (most standard computer screens use a DVI-D connector, not a DVI-I one).
Alternatively, if you really do end up needing to view the console of your Raspberry Pi (for example to configure an IP address in Arch Linux if you do not have a DHCP server), you can simply hook the Raspberry Pi to your TV set using the Composite RCA (PAL & NTSC) connector.
Once you have your hardware, here is how to get Percona Server for MySQL up and running:
- Insert the SD card into a slot on your laptop or desktop PC.
- Download Fedora ARM Installer (available for Linux and Windows).
- Download the Arch Linux ARM image from the Raspberry Pi website and unzip.
- Start Fedora ARM Installer (in Windows make sure to right-click the exe and “Run as administrator”).
- Select the image file (about 1.8GB .img file) and select the destination drive to write the image to. Make sure you selected the right drive and click “Install”.
- The image gets written to a 2Gb partition on the card. If you have a larger card, you can add another partition later.
- Software eject the SD card using your OS’es software eject system (to prevent partial writes), take out the card and insert into your Pi. Carefull, the card goes upside down

- Plug in the network lead to the Raspberry Pi, and connect the other end of the lead to your router.
- Plug in the Micro USB power lead to the Raspberry Pi, the other side to the power supply. Plug in the power supply.
- The Raspberry Pi will automatically get an IP address from the DHCP server (Arch Linux has this preset)
- Also, Arch Linux has sshd already active (sshd=ssh daemon, a software package allowing you to connect to a [Linux] server console/command prompt).
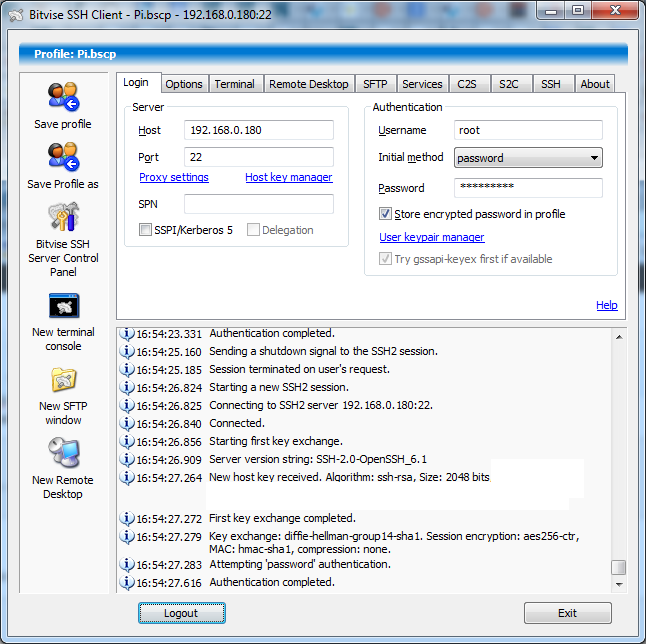
- Connect via ssh to the Raspberry Pi. For windows, I use the Tunnelier SSH Client from Bitvise
- If you do not know what IP address the Raspberry Pi got (likely the first available address in your DHCP range), you can always check your router’s DHCP table which should list all IP addresses it assigned, usually together with a host name.
- While there, you could also assign a permanent IP address (still assigned via DHCP) by binding a MAC address to a reserved IP in your router’s DHCP server setup. This makes it easier later on.
- You could also assign a permanent DNS name (like pi.yourdomain.com) by binding the reserved IP to a DNS name in your router’s DNS server setup.
- Once connected to the Raspberry Pi, either via ssh on Linux or Tunnelier on Windows, update the root password first:
[root@alarmpi ~]# passwd
Enter new UNIX password:
Retype new UNIX password:
passwd: password updated successfully
(If you use Windows+Tunnelier and have saved your password in the configuration file, update it in Tunnelier now also)
- Re-connect to see if your password change worked as expected, and install Percona Server from the Arch Linux AUR Repo at the same time:
(pacman is the ‘Package Manager’ for Arch Linux)[root@alarmpi ~]# pacman -S percona-server resolving dependencies... looking for inter-conflicts... Targets (4): libaio-0.3.109-6 libmysqlclient-5.5.30-1 mysql-clients-5.5.30-1 percona-server-5.5.29_rel29.4-1 Total Download Size: 8.07 MiB Total Installed Size: 96.00 MiB Proceed with installation? [Y/n] y :: Retrieving packages from extra... libmysqlclient-5.5.30-1-armv6h 3.2 MiB 435K/s 00:08 [########################################################] 100% mysql-clients-5.5.30-1-armv6h 736.6 KiB 395K/s 00:02 [########################################################] 100% :: Retrieving packages from community... libaio-0.3.109-6-armv6h 4.6 KiB 1089K/s 00:00 [########################################################] 100% percona-server-5.5.29_rel29.4-1-armv6h 4.1 MiB 323K/s 00:13 [########################################################] 100% (4/4) checking package integrity [########################################################] 100% (4/4) loading package files [########################################################] 100% (4/4) checking for file conflicts [########################################################] 100% (4/4) checking available disk space [########################################################] 100% (1/4) installing libmysqlclient [########################################################] 100% (2/4) installing mysql-clients [########################################################] 100% (3/4) installing libaio [########################################################] 100% (4/4) installing percona-server [########################################################] 100% Installing MySQL system tables... OK Filling help tables... OK [...more setup information, please read...]
- [Optional] Set Percona server to startup at boot time
[root@alarmpi ~]# systemctl enable mysqld
ln -s '/usr/lib/systemd/system/mysqld.service' '/etc/systemd/system/multi-user.target.wants/mysqld.service'
- Start Percona Server
[root@alarmpi ~]# systemctl start mysqld
- Connect using the mysql client:
[root@alarmpi ~]# /usr/bin/mysql
Welcome to the MySQL monitor.  Commands end with ; or \g.
[...]
mysql> SHOW ENGINES;
+--------------------+---------+----------------------------------------------------------------------------+--------------+------+------------+
| Engine             | Support | Comment                                                                    | Transactions | XA   | Savepoints |
+--------------------+---------+----------------------------------------------------------------------------+--------------+------+------------+
| InnoDB             | DEFAULT | Percona-XtraDB, Supports transactions, row-level locking, and foreign keys | YES          | YES  | YES        |
[...]
mysql> SELECT "Hello World!" AS "Success!" \G
*************************** 1. row ***************************
Success!: Hello World!
1 row in set (0.00 sec)
Now that was easy wasn’t it?
A few other points:
- This setup uses Percona Server for MySQL with the latest mysql client, which is untested, but should be “ok/fine” in most situations
- If you want to edit the configuration file, you can find it in /etc/mysql/my.cnf
- If you setup Percona Server to startup at boot time (step 12), give your little server a reboot (type “reboot”) now and check that Percona Server works fine afterwards.
- Make sure to secure your server properly, especially if it will be exposed on the Internet or if this will be a production server.
- Secure the initial accounts for your installation.
- If this will be a production server, you should use a seperate userID to run Percona Server.
- There are more (OS and otherwise) steps necessary then what it listed here to make your server secure, but those are outside the scope of this article.
- To check if mysqld is running, use “ps -ef | grep -v grep | grep mysqld” at the Linux command line
- If you did get a SD card which is larger then 2GB, you can add another partition using fdisk & mkfs.ext4 (comment below if you cannot work out how, and I can post some additional information)
Enjoy!
The post Percona Server on the Raspberry Pi: Your own MySQL Database Server for Under $80 appeared first on MySQL Performance Blog.

